

ども! ブログマーケッターのジュンイチです。(Junichi_Santa)
今回は、Googleオプティマイズという無料のウェブテストができるツールを、あなたのWordPressサイトに実装する設定方法を解説します。
初心者さんにはハードルが高いかもしれませんが、この記事の手順通り進めてもらえたら設定できます!
是非落ち着いて、一緒に作業を進めていきましょう。
Googleオプティマイズでできること
オプティマイズって何? 何ができるの?っていうのは、Googleオプティマイズとは?成果を上げたい人ほど使ってほしい最高の分析ツールで詳しく解説しています。
まずはそちらも参考にしてみてください。
「そんなことわかってるぜ!早く設定しようぜ!」
っていうあなたは、早速一緒に設定をしていきましょう。
Googleオプティマイズの導入に必要な手順
少なくともこの2つは、予めやっておく必要があります。
- Googleタグマネージャを導入
- Googleアナリティクスの設置
以下の記事で、1、2それぞれ詳しく解説していますので、まだできていなければ先にそちらをやってみてください。
ここまでできている方は、以下の作業に進みましょう!
Googleオプティマイズを導入しよう
さぁでは、Googleオプティマイズを実装していきましょう。
大きなステップとしては、
- STEP1. オプティマイズのアカウントを作る
- SETP2. タグマネージャでオプティマイズのタグを設定する
- STEP3. あなたのWordPressサイトにコードを追加
- STEP4. ちゃんとインストールできたかチェックする
という大きな4つのステップです。では、実際にやっていきましょう!
STEP1. オプティマイズのアカウントを作る
それでは、画像を使って解説をしていきます。
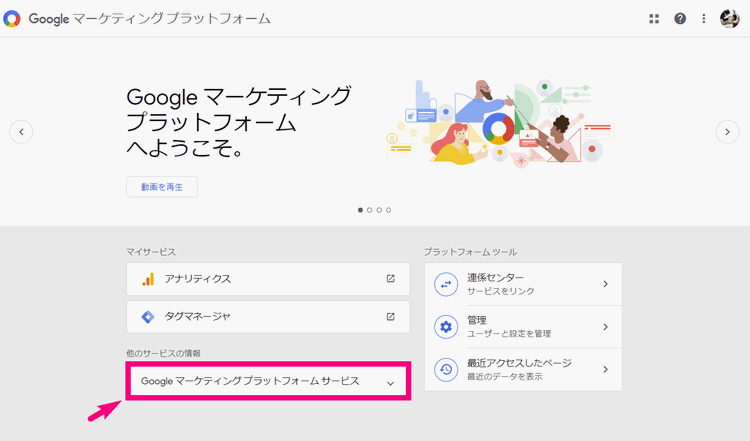
まずは、Googleマーケティングプラットフォームへ行きます。
↓するとこんな画面になるので真ん中の青いボタンを押してログインします。

↓ オプティマイズを初めて使う時はメニューが隠れているので「他のサービスの情報」の『Googleマーケティングプラットフォームサービス』をクリック
↓オプティマイズのメニューが見つかると思うので、『設定』をクリック

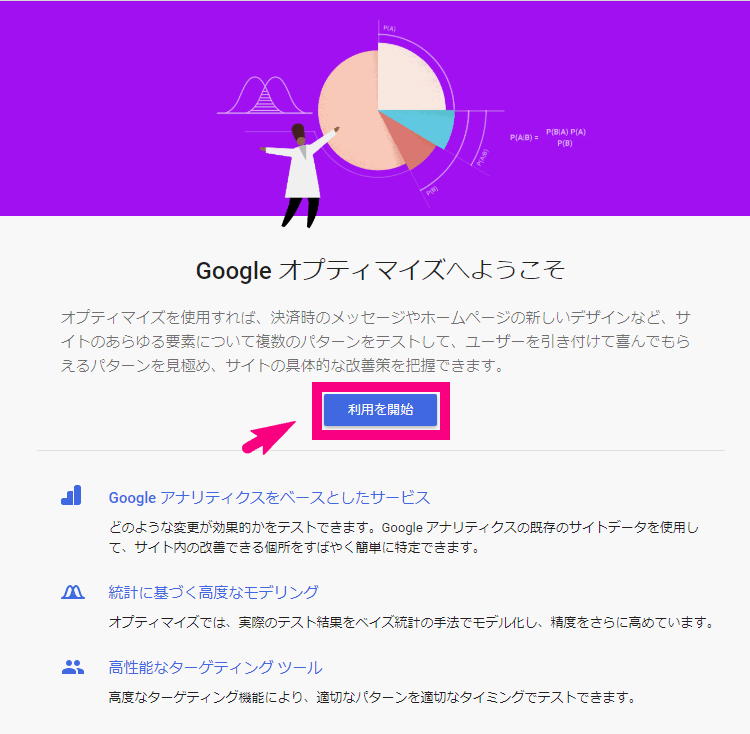
↓ようこそと出るので、「利用を開始」をクリック
↓ ここは、「はい」「いいえ」どちらでもOKですが、僕は一応全てはいにしています。チェックが出来たら『次へ』をクリック

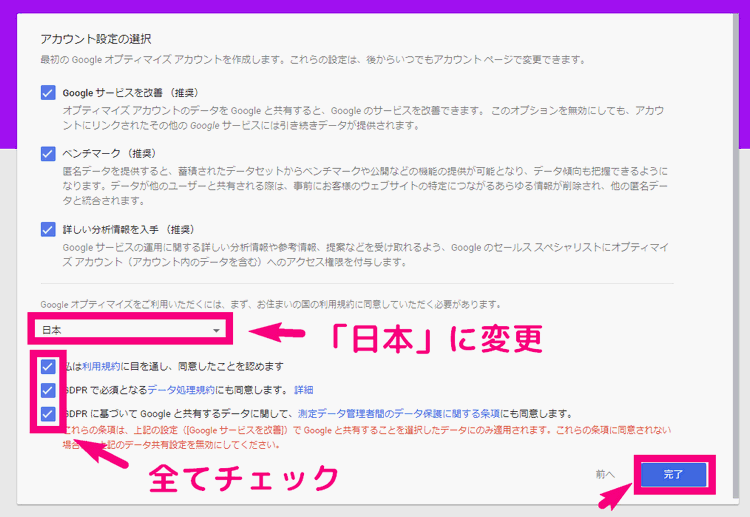
↓ 次の画面では、国を日本に変更、規約に同意チェックが3つあるので全てにチェック。できたら『完了』をクリックしましょう
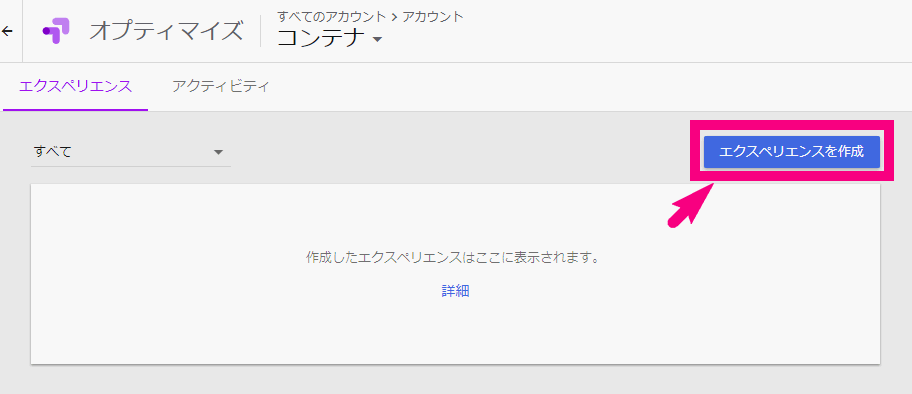
↓ するとこんな画面になります。
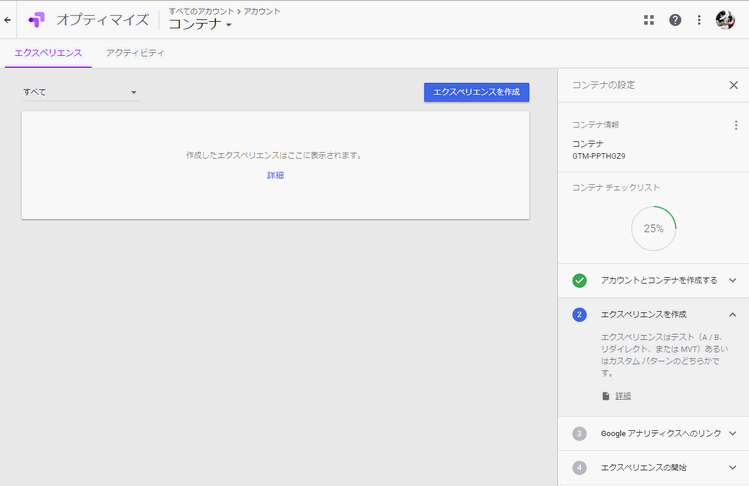
↓ 右上にある『エクスペリエンスを作成』という青いボタンをクリック。
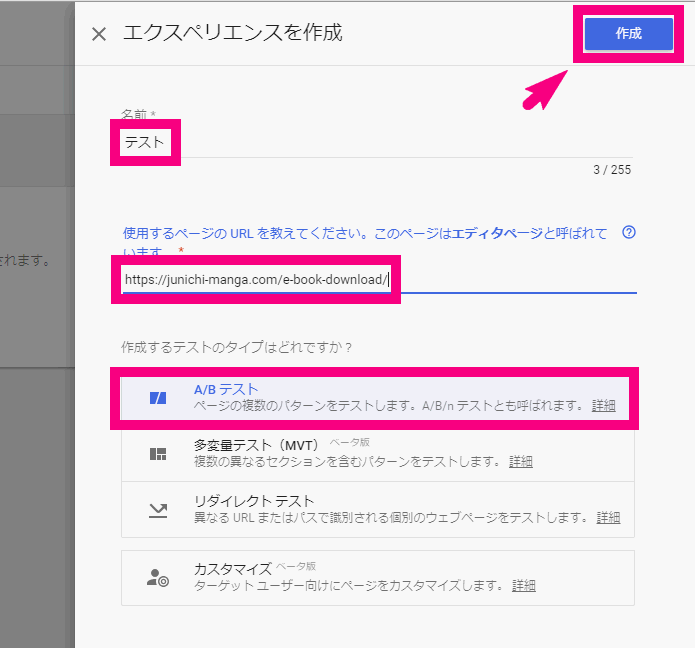
↓ これは本来ウェブテストを作る画面ですが、今回はオプティマイズの導入をしたいので、適当に作ってOKです。
名前「テスト」、使用するページのURL「あなたのブログのURLなんでもOK」、作成すするテストのタイプ「A/Bテスト」を選んで「作成」をクリック。
↓ 続いて画面が切り替わるので、右の方の「Googleアナリティクス」の中の「コンテナページに移動」をクリック。

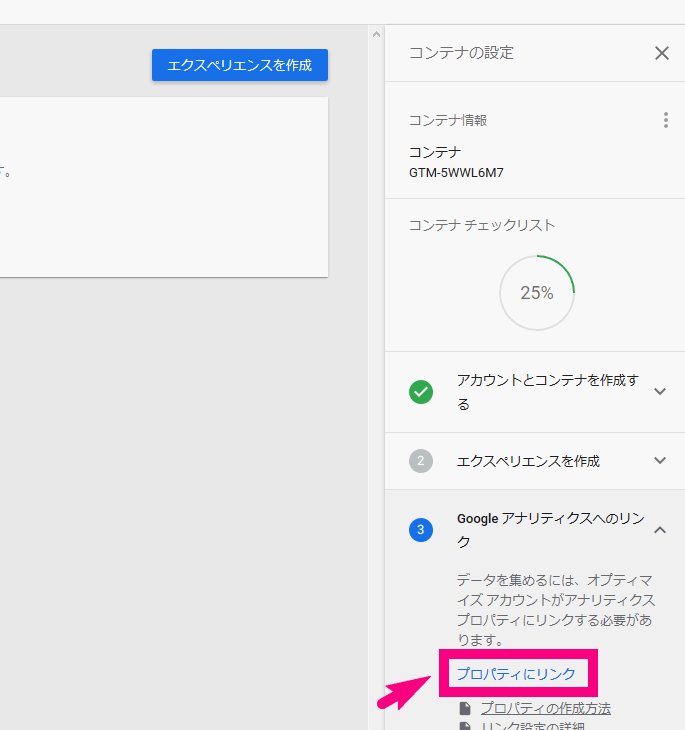
↓右の方に出る「Googleアナリティクスへのリンク」の中の『プロパティにリンク』をクリック。

↓ 『プロパティにリンク』が出てくるのでクリック
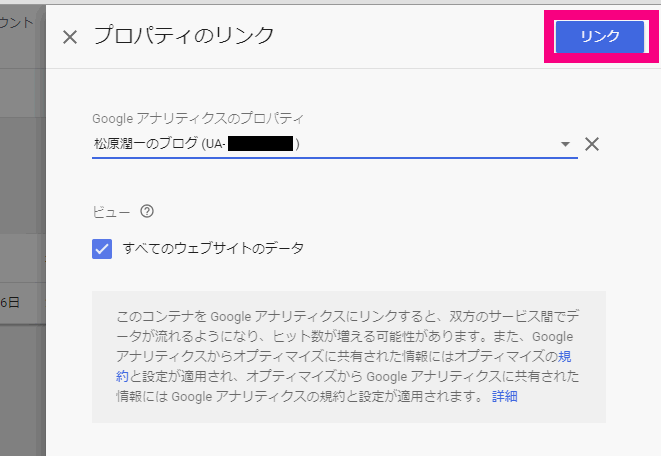
↓ Googleアナリティクスのプロパティというところに「プロパティを選択 ▼」があるのでクリック

↓ ここで、アナリティクスのあなたのプロパティが出てくるので選択。
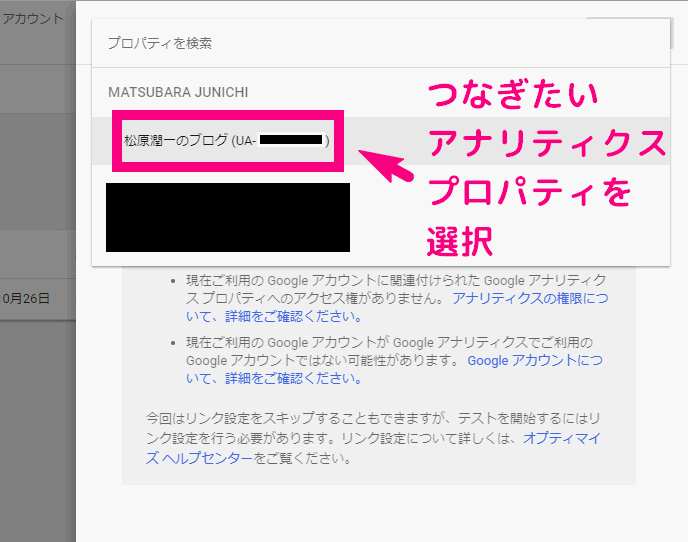
↓ 選んだら右上の『リンク』をクリック
↓ 次にオプティマイズのスニペットをサイトに追加しますか?と出るので、『今回はスキップ』をクリック。
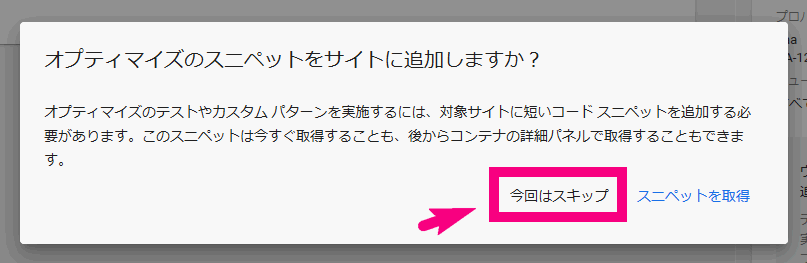
一旦ここで、オプティマイズでの画面の設定は中断です。
別のタブで、Googleタグマネージャのサイトを開きましょう!
STEP2. タグマネージャでオプティマイズのタグを設定する
では、別のタブでGoogleタグマネージャを開きます。
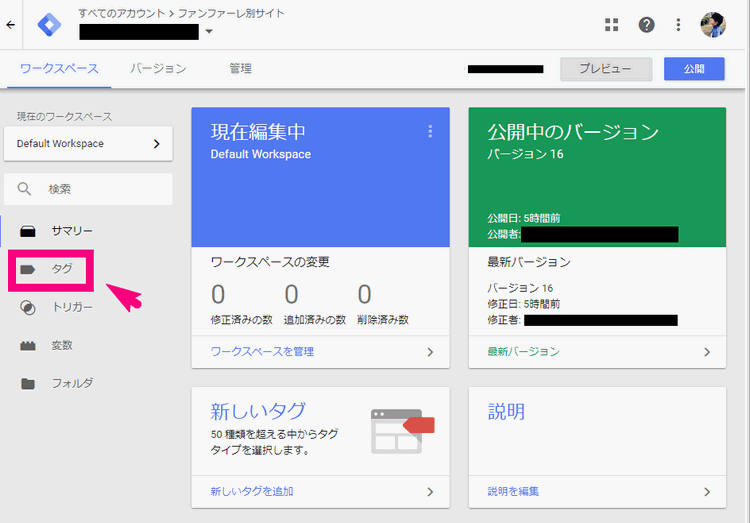
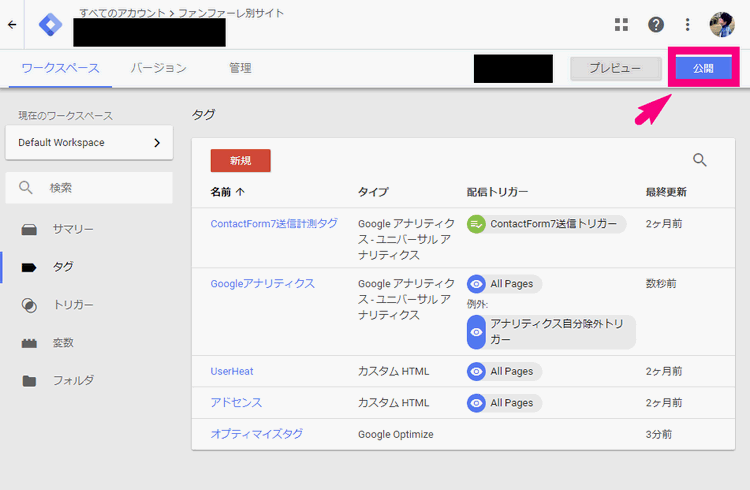
↓このようなワークスペースの画面までいきましょう。そんでもって左の方の『タグ』をクリックします。
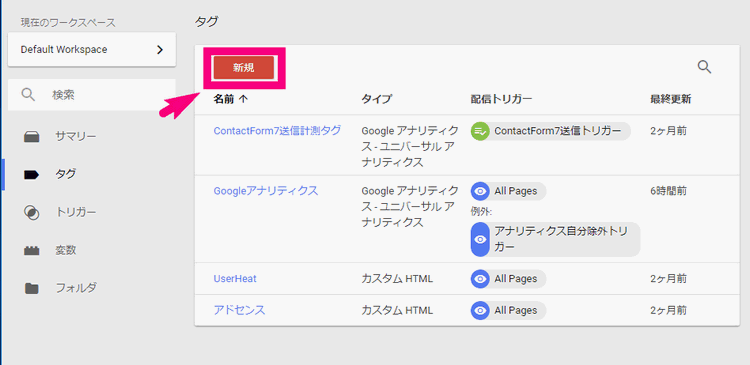
↓ 『新規』の赤いボタンをクリック
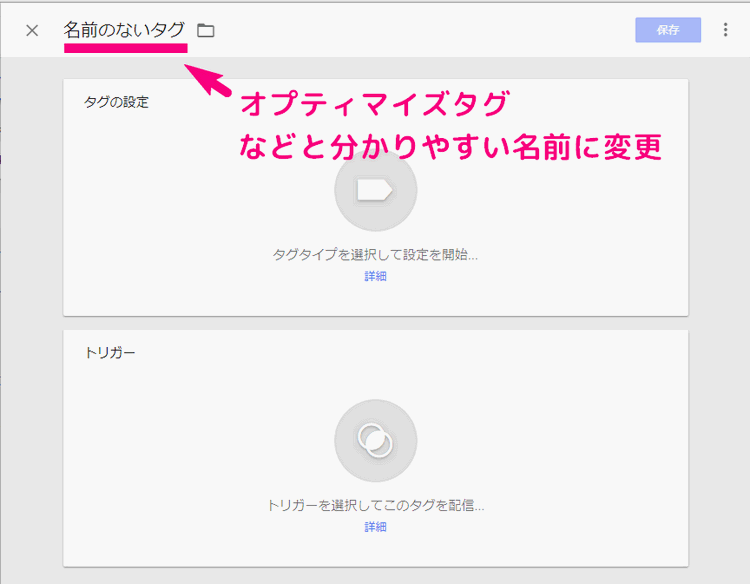
↓左上の名前を『オプティマイズタグ』などと分かりやすい名前に変更しましょう
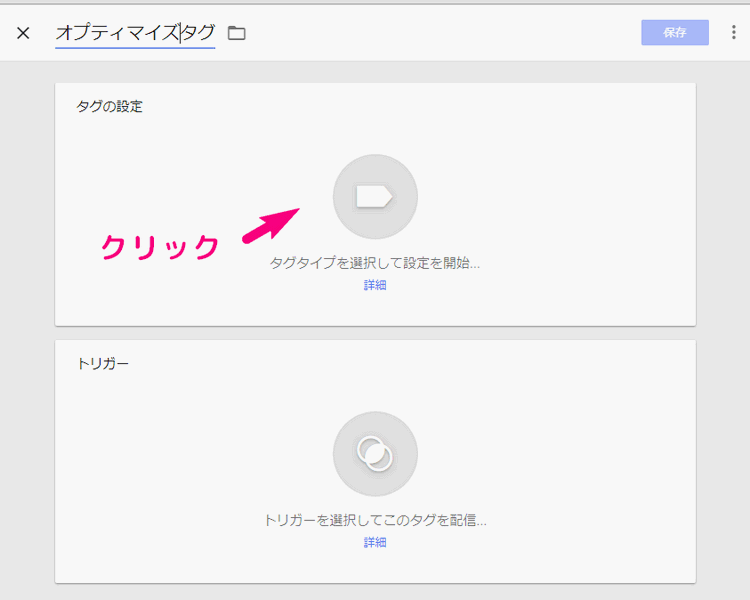
↓ 次に、タグの設定のエリアのどこでもいいのでクリック
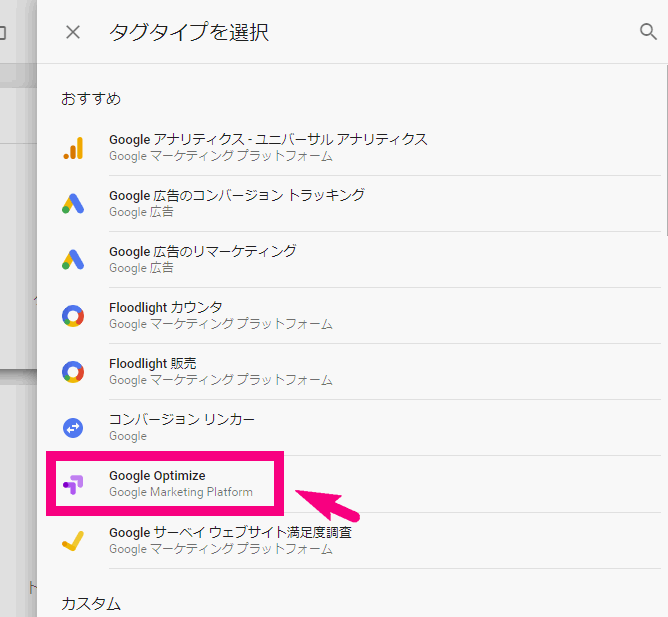
↓ 右の方から出てくるメニューに『Google Optimize』というのがあるのでクリック。
ここで、一旦オプティマイズのサイトに戻ります。
↓ オプティマイズのサイトの右の方にコンテナ情報があって、GTM-XXXXXXXというあなただけのコードがあるのでコピーしましょう。
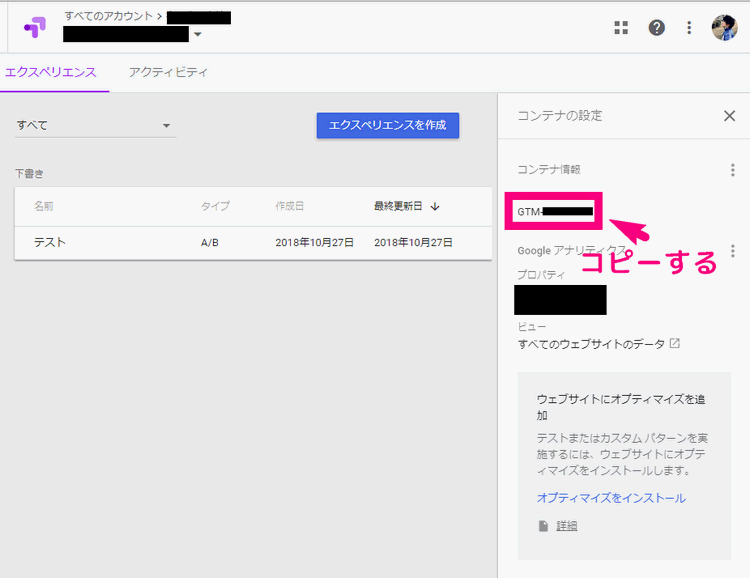
ここで、またタグマネージャのサイトのサイトに戻ります。
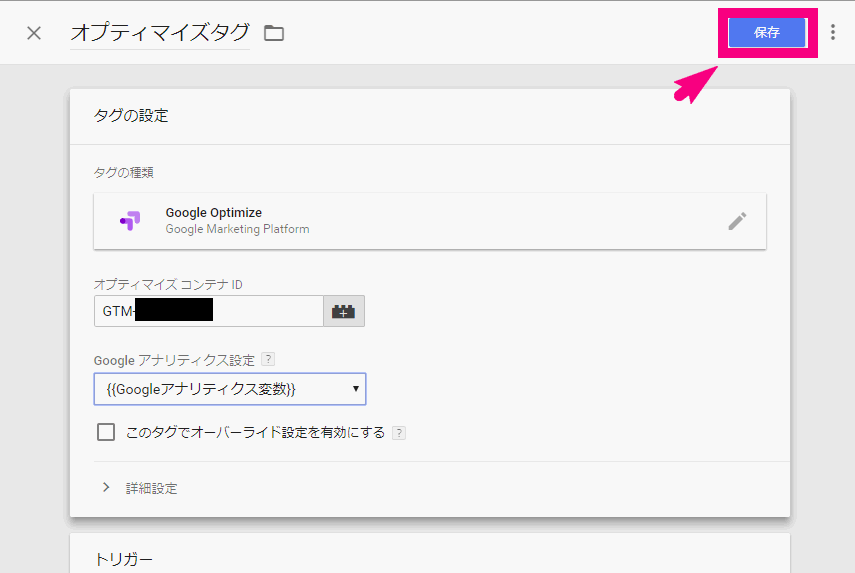
↓ さきほどコピーしたコードを、オプティマイズコンテナIDのところに貼りましょう。

↓ Googleアナリティクス設定のところは、あなたがアナリティクスの設定をした時に作った変数を選びます。たぶん出てくると思います。

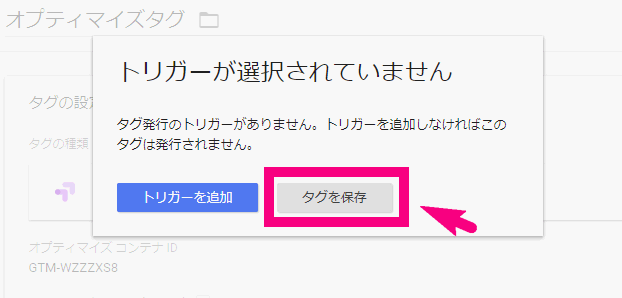
↓ 右上の『保存』をクリック
↓ トリガーが選択されていません、と出ますが『タグを保存』でOKです。
↓ 次に、タグの一覧からあなたが以前にGoogleアナリティクスを設置する時に作ったタグを選択します。
(※名前はあなたが付けているはずです。「Googleアナリティクスタグ」など)
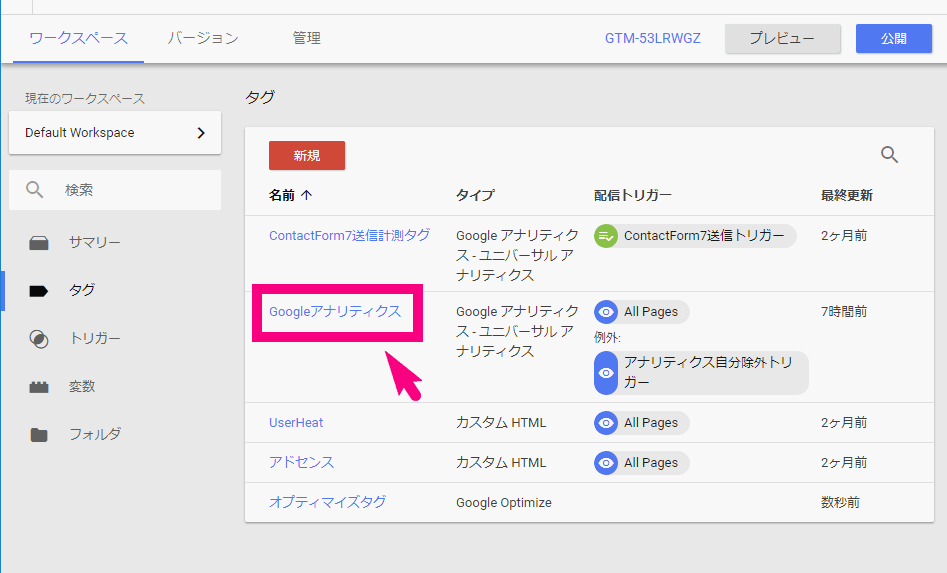
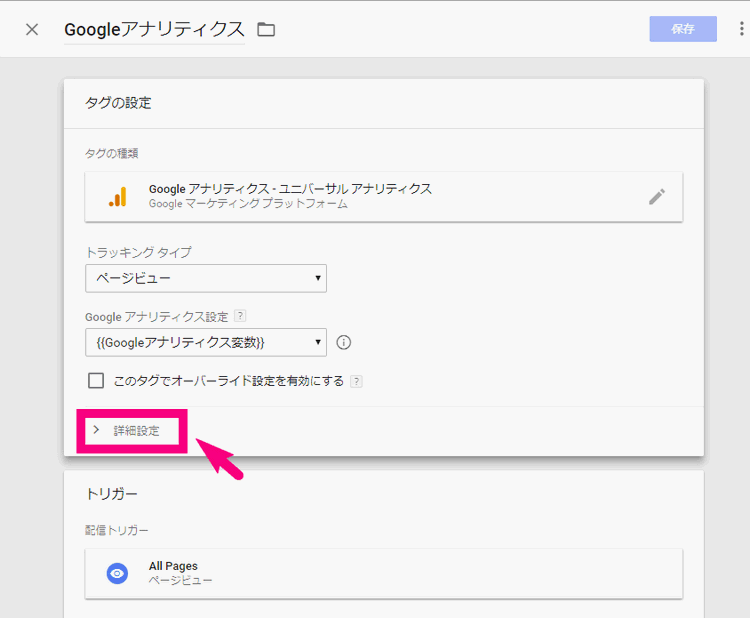
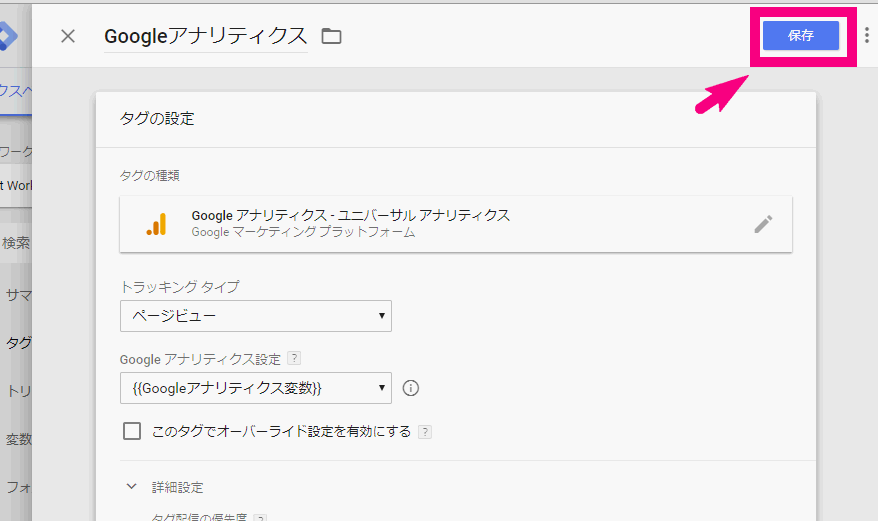
↓ 以前に設定したものが出てくるので、タグの設定のエリアならどこでもいいのでクリック
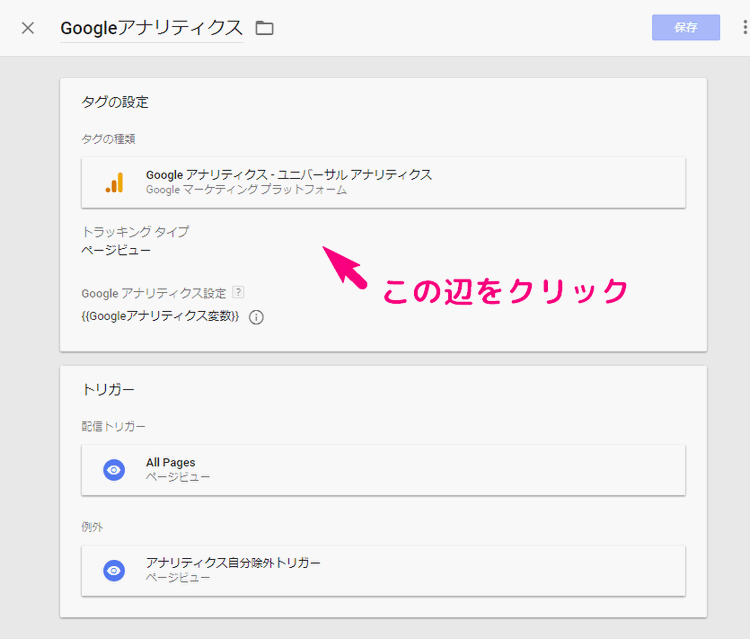
↓「> 詳細設定」をクリック
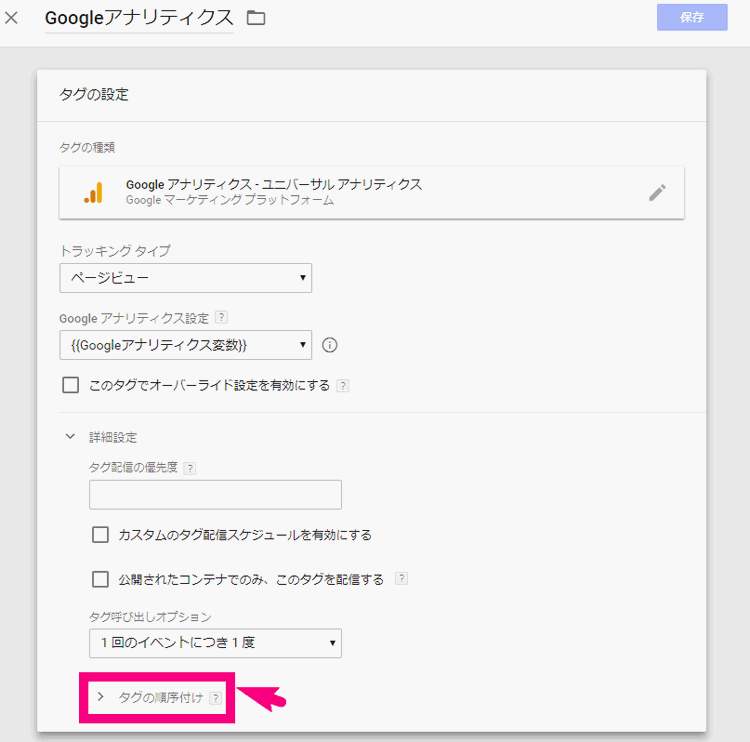
↓「> タグの順序付け」をクリック
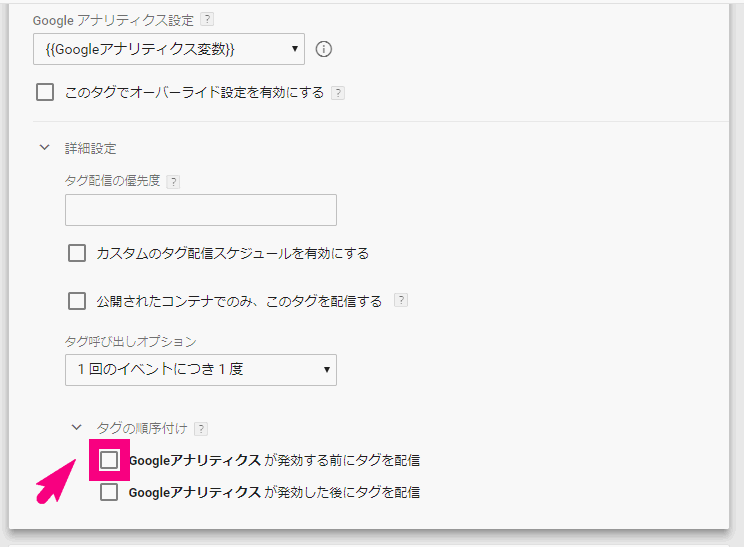
↓ 「あなたがGoogleアナリティクス用に設定したタグ名」が発効する前にタグを配信 の方にチェック
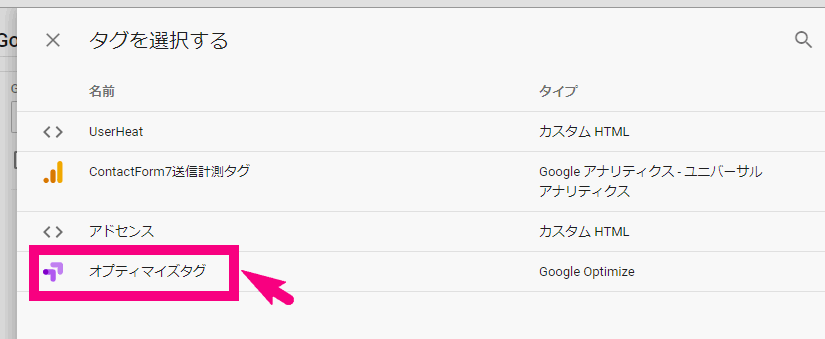
↓ 設定タグを選ぶところが出てきます。『タグを選択』をクリック
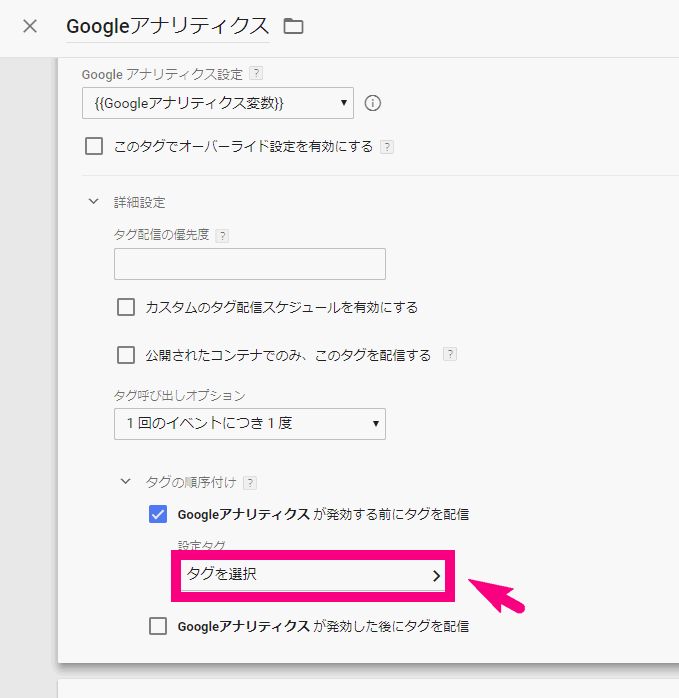
↓ ここで先ほど作った『オプティマイズタグ』が出てくるので、選択。
↓ これで右上の「保存」をクリック
↓ 右上の「公開」ボタンをクリック
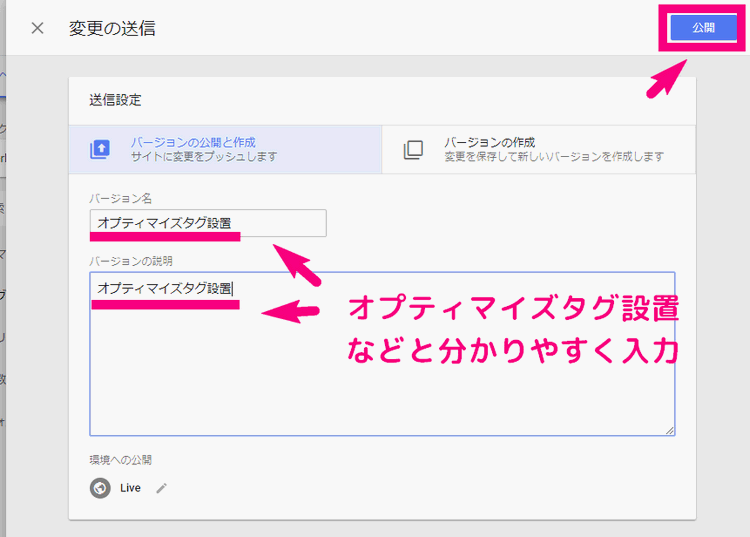
↓ バージョン名・バージョンの説明を分かりやすく「オプティマイズタグ設置」などと入力して、右上の「公開」をクリック。
これで一旦タグマネージャでの作業は終了です!
次はあなたのWordPressサイトに移動しましょう!
STEP3. あなたのWordPressサイトにコードを追加
次に、以下のコードをあなたのサイトの<head>タグの中のなるべく上の方に追加します。
これを追加したほうが、ウェブテストのページがスムーズに表示されるようになります。
<!-- Page hiding snippet (recommended) -->
<style>.async-hide { opacity: 0 !important} </style>
<script>
(function(a,s,y,n,c,h,i,d,e){s.className+=' '+y;
h.end=i=function(){s.className=s.className.replace(RegExp(' ?'+y),'')};
(a[n]=a[n]||[]).hide=h;setTimeout(function(){i();h.end=null},c);
})(window,document.documentElement,'async-hide','dataLayer',4000,{'GTM-XXXXXX':true});
</script>
※上のコードでうまくオプティマイズが動かない場合は、以下のコードもためしてみてください↓↓
<!-- Anti-flicker snippet (recommended) -->
<style>.async-hide { opacity: 0 !important} </style>
<script>(function(a,s,y,n,c,h,i,d,e){s.className+=' '+y;h.start=1*new Date;
h.end=i=function(){s.className=s.className.replace(RegExp(' ?'+y),'')};
(a[n]=a[n]||[]).hide=h;setTimeout(function(){i();h.end=null},c);h.timeout=c;
})(window,document.documentElement,'async-hide','dataLayer',4000,
{'GTM-XXXXXX':true});</script>
<!-- Page hiding snippet (recommended) -->
<style>.async-hide { opacity: 0 !important} </style>
<script>
(function(a,s,y,n,c,h,i,d,e){s.className+=' '+y;
h.end=i=function(){s.className=s.className.replace(RegExp(' ?'+y),'')};
(a[n]=a[n]||[]).hide=h;setTimeout(function(){i();h.end=null},c);
})(window,document.documentElement,'async-hide','dataLayer',4000,{'GTM-XXXXXX':true});
</script>
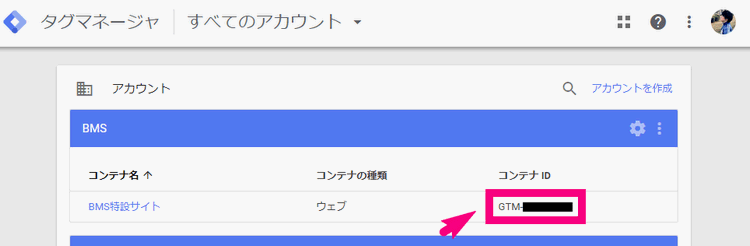
あなたのタグマネージャのコンテナIDの調べ方
↓タグマネージャのトップページに行くとこんな画面があります。ここであなたのアカウントが調べられます。(GTMXXXXXX)の部分。
では、あなたのWordPressサイトに行きましょう!
<head>タグの中にコードを追加するので、お使いのWordPressテーマによってやり方は違います。
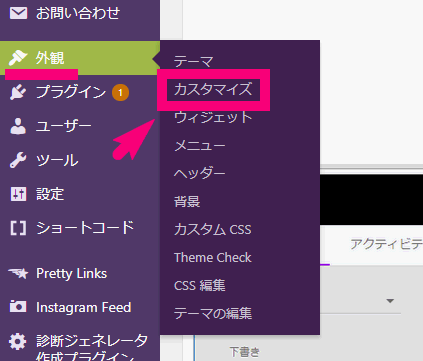
パターン1. WordPressテーマELEPHANT3、Seal、Giraffeをお使いの方
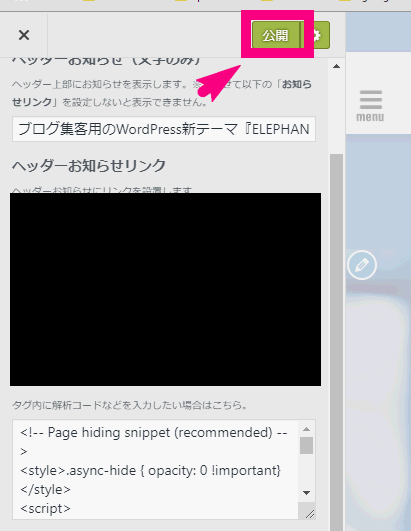
↓「外観」 ⇒ 「カスタマイズ」をクリック。
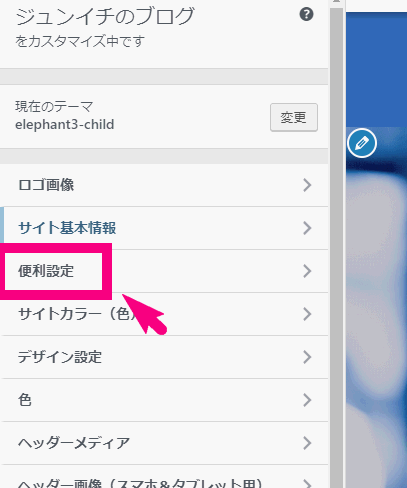
↓ 「便利設定」をクリック
↓ headタグという中に先ほどコピーして、GTMXXXXXXXをあなたのコードに変更したものを貼付けます。
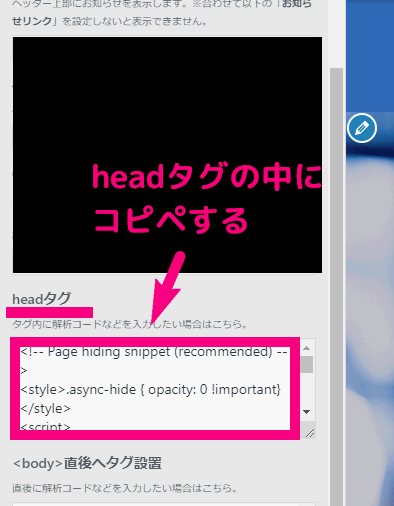
↓ 次に『公開』ボタンをクリックして完了です!
WordPressテーマELEPHANT3、Seal、Giraffeをお使いの方はこれでSTEP4に行きましょう!
パターン2. それ以外のWordPressテーマをお使いの方
次に、それ以外のWordPressテーマをお使いの方です。
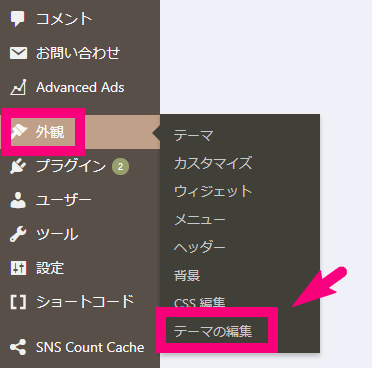
↓「外観」⇒「テーマの編集」をクリック。
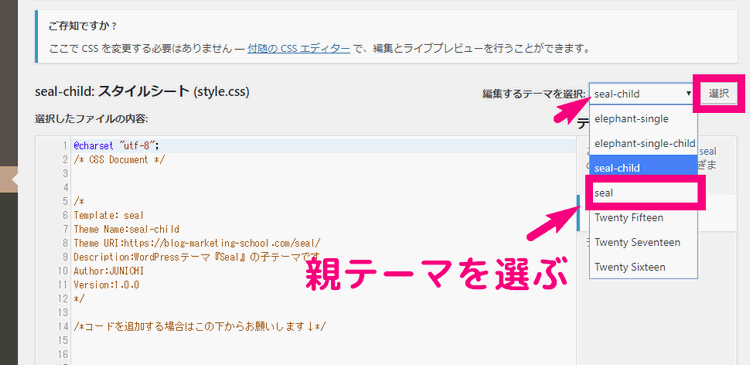
↓右上の「編集するテーマを選択」で親テーマを選びましょう。
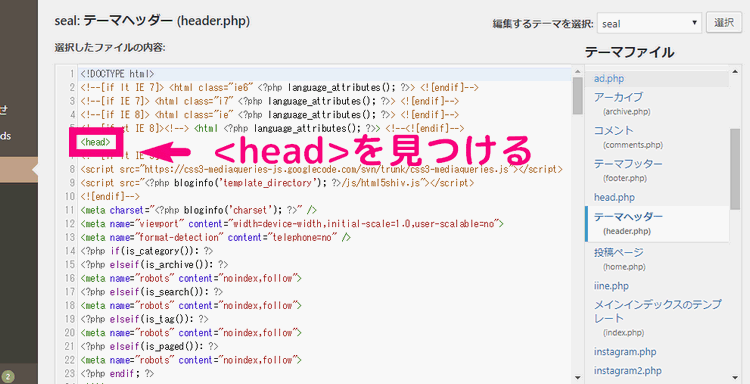
↓ 次に『テーマヘッダー(header.php)』をクリックします。
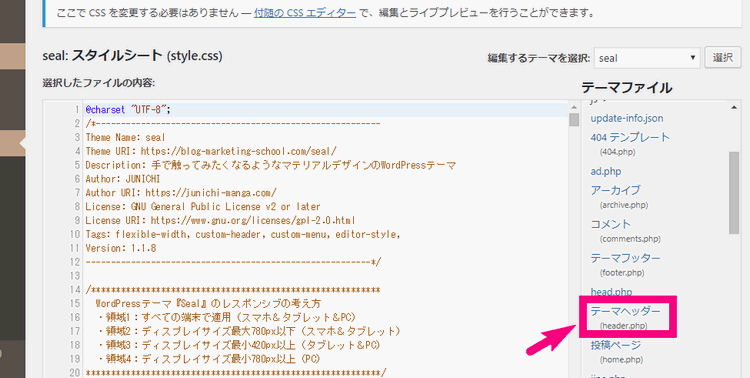
↓<head>という部分を見つけましょう。
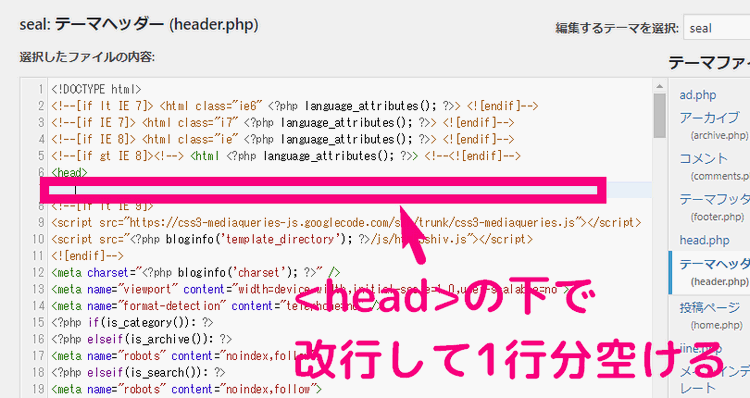
↓見つけたら、その1行下に空白の1行を空けましょう。ここにコピーしたコード(GTMXXXXXXはあなたのタグマネージャのコンテナID)を貼りつけて、下の方にある「ファイルを更新」ボタンを押して完了です。
WordPressテーマELEPHANT3、Seal、Giraffe以外をお使いの方はこれでSTEP4に行きましょう!
STEP4. オプティマイズのインストール状況の確認
では、最後にちゃんとオプティマイズがインストールできているか? チェックをしましょう。
オプティマイズのサイトに戻りましょう!
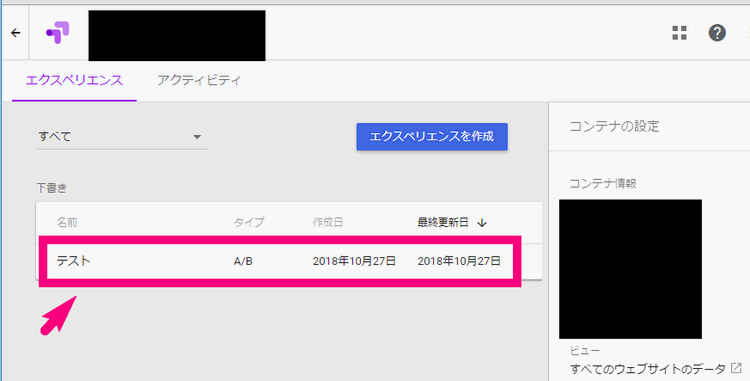
↓ 先ほど適当に作った「テスト」みたいなものをクリックしてください。
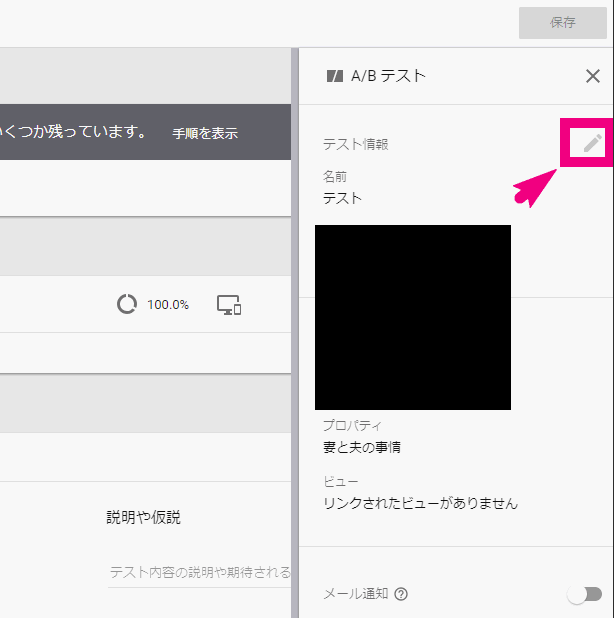
↓ 右上の鉛筆?ペンマークのボタンをクリックします。
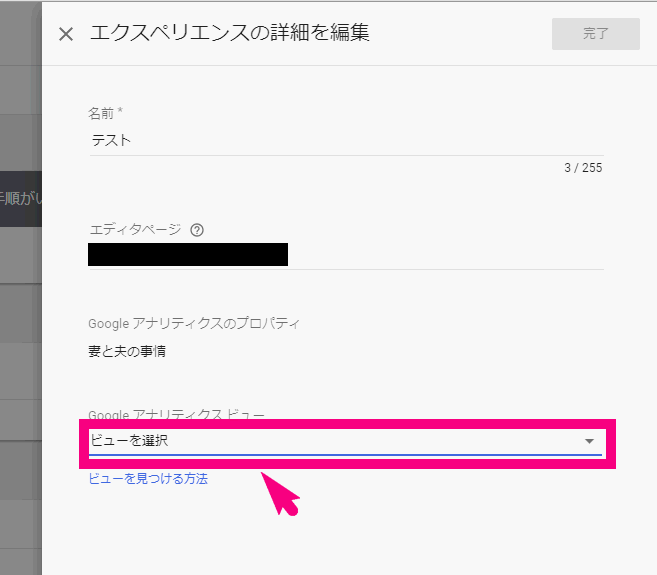
↓ Googleアナリティクスビューの部分の「ビューを選択」をクリック。
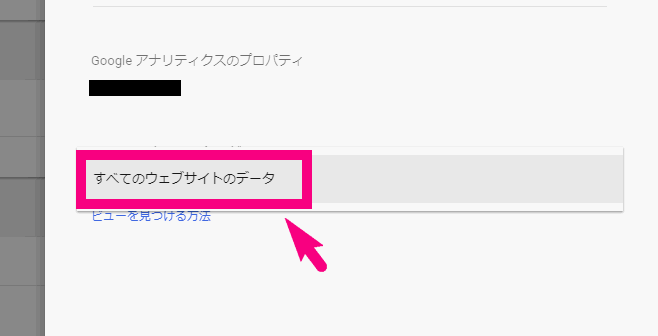
↓「すべてのウェブサイトのデータ」をクリック
↓ 右上の『完了』をクリックします。

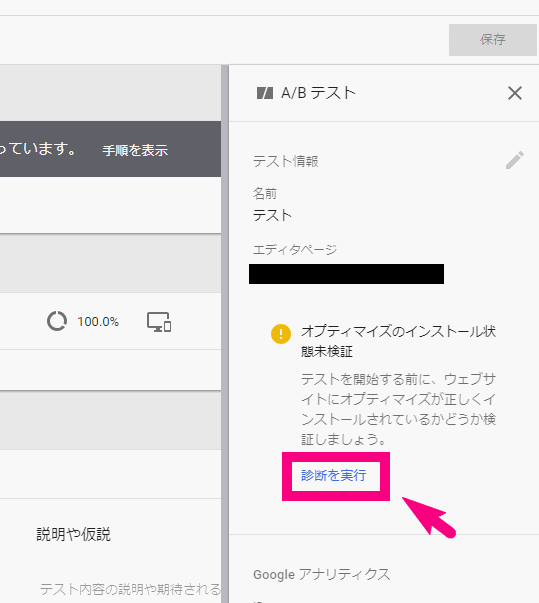
↓ 次に右の方に出てくるオプティマイズのインストール状態未検証という部分の「診断を実行」をクリック。
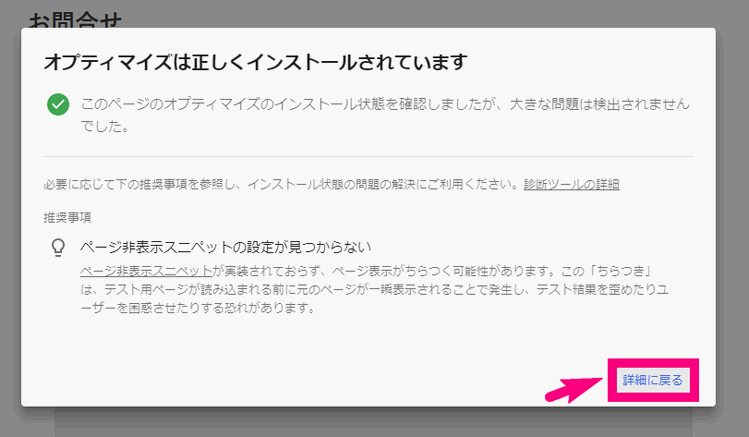
↓ これで「オプティマイズは正しくインストールされています」と出ればOKです!「詳細に戻る」をクリック。
意味がわからなかったかもしれませんが、これでオプティマイズの導入は完了です!
お疲れ様でした!
まとめ:次回からは、実際にオプティマイズを使ってウェブテストを作ってみよう!
大変でしたか!?
初めてだとわけが分からなかったかもしれませんが、この通りにやってもらえたらオプティマイズでウェブテストができるようになります。
今回は、下準備だけで、オプティマイズを実装しただけです。
次回からは、さっそくA/Bテストなどのウェブテストを作る方法を説明していきますね!